The first decision you make when you pick up a camera is whether to shoot horizontal or vertical. Even in the same place, simply rotating the camera 90 degrees changes the impression of a photo a great deal, yet on location we often shoot out of habit in only one orientation and regret it later.
This article uses 8 photos, 4 shot horizontally and 4 vertically, together with the shooting settings (EXIF) of each, to go through when to choose a horizontal or a vertical photo. It covers how to decide orientation from the shape of the scene, how to think about angle of view and aperture together, and a checklist you can use right on location.
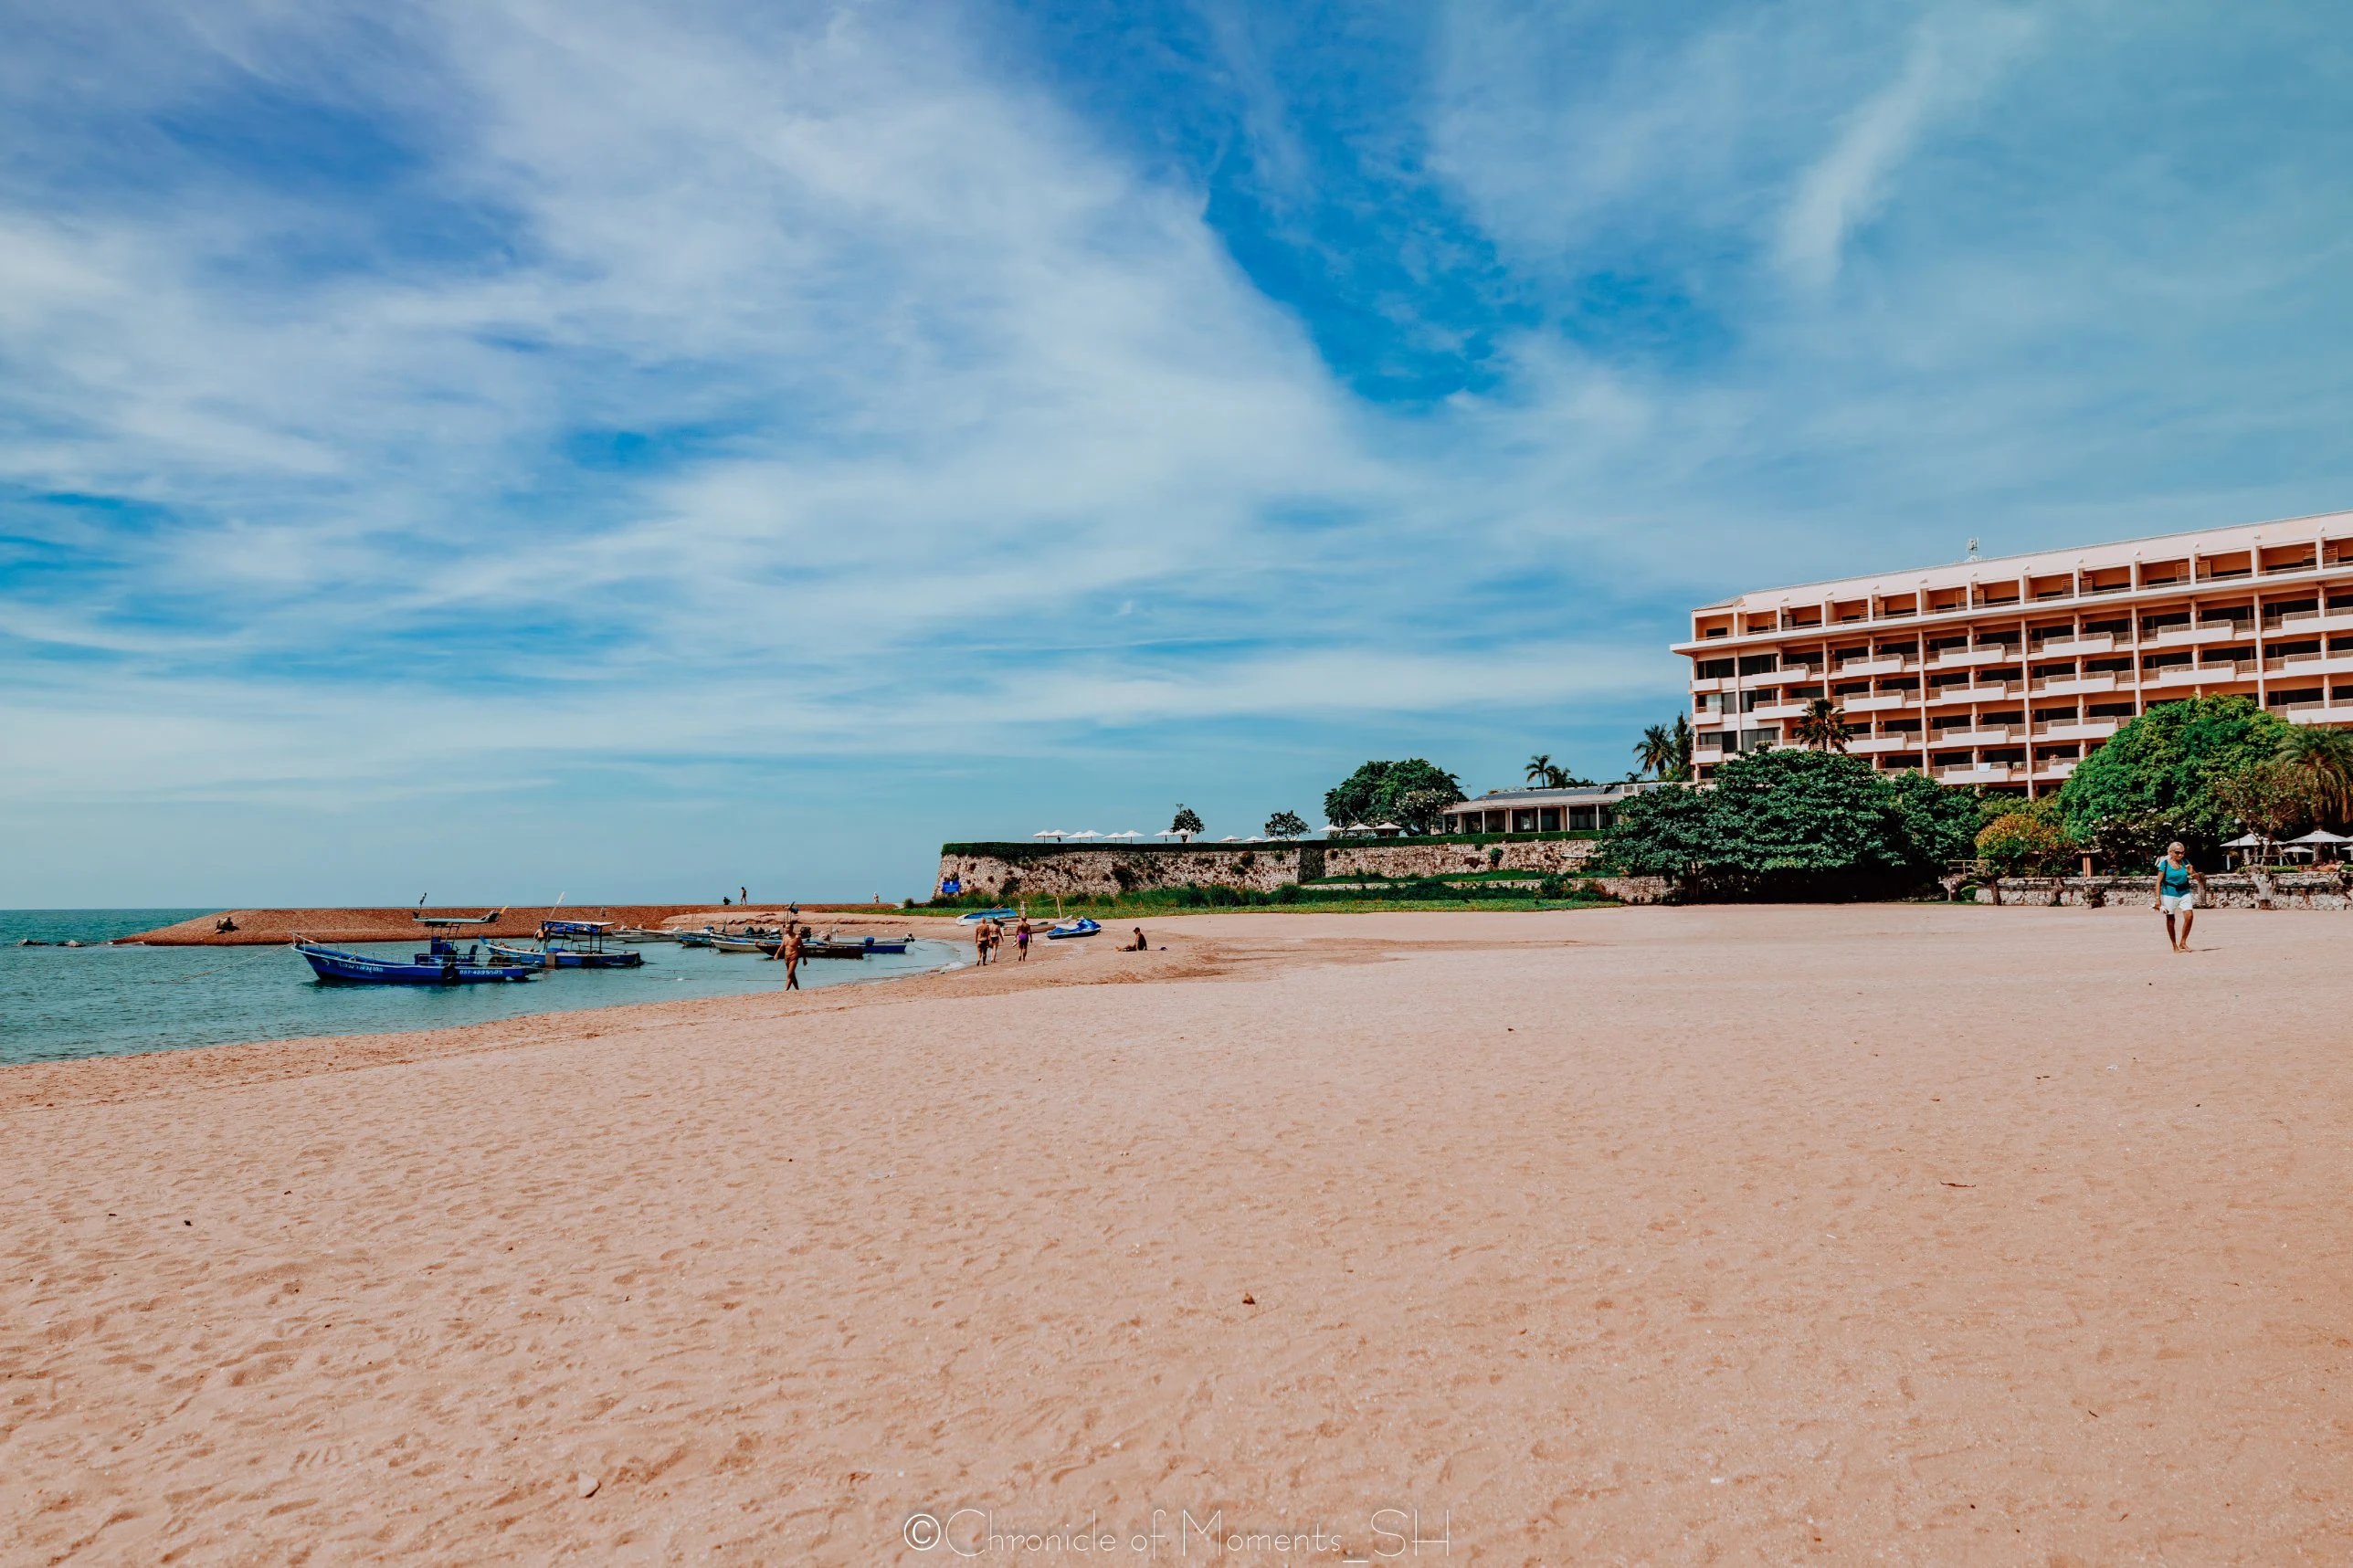
Canon EOS R7 · RF15-35mm F2.8 L IS USM · 15mm · F2.8 · ISO 100 · 1/2500 s · 2024-11-20
(Click the photo to view it at full size)
Horizontal vs. Vertical: What's the Difference?
In a horizontal photo the eye flows left and right, and in a vertical photo it flows up and down. Human eyes see wide from side to side, so a horizontal frame resembles our usual field of view and feels comfortable, while a vertical frame gathers the eye toward a single point and emphasizes height and depth. The table below compares the characteristics of the two orientations at a glance.
| Aspect | Horizontal photo | Vertical photo |
|---|---|---|
| Flow of the eye | Spreads left and right | Runs up and down |
| Scenes that suit it | Wide landscapes, rows of buildings, scenes with several elements side by side | Tall buildings, people or objects with sky, alleys with a sense of depth |
| Feeling it gives | Stability, ease, breadth | Height, depth, focus |
| Where it is often used | Monitors, blog body text, video | Smartphone screens, vertical feeds |
| Watch out for | Easily becomes flat without a center | Narrow side space cuts off surrounding elements |
In the end, the starting point of the choice is the shape of the scene. If the scene is long sideways, horizontal comes to mind first; if it is long vertically, vertical does; but depending on what you want to emphasize, shooting the opposite can also be a good approach. For composition in general, see 5 Composition Checks Before You Press the Shutter as well.
When Horizontal Fits ①: A Wide, Sweeping Landscape
As in the photo at the top, a scene where sky, sandy beach, and distant buildings layer one after another is most natural in a horizontal frame. In landscapes like this the elements line up sideways, so shooting vertically cuts off the left and right and leaves only sky and sand above and below, losing the breadth of the scene.
This photo was taken at an ultra-wide 15mm, F2.8, 1/2500 s. With a clear daytime sky the shutter is very fast, and because the brightness difference between sky and sand is large, it is worth checking that the texture of the clouds has not blown out. The R7 used here has an APS-C sensor, so 15mm is about 24mm in 35mm equivalent. A wide angle of view emphasizes the breadth of a horizontal frame even more. You can check the conversion with the crop factor calculator.
When Horizontal Fits ②: Rows of Buildings and Continuous Walls
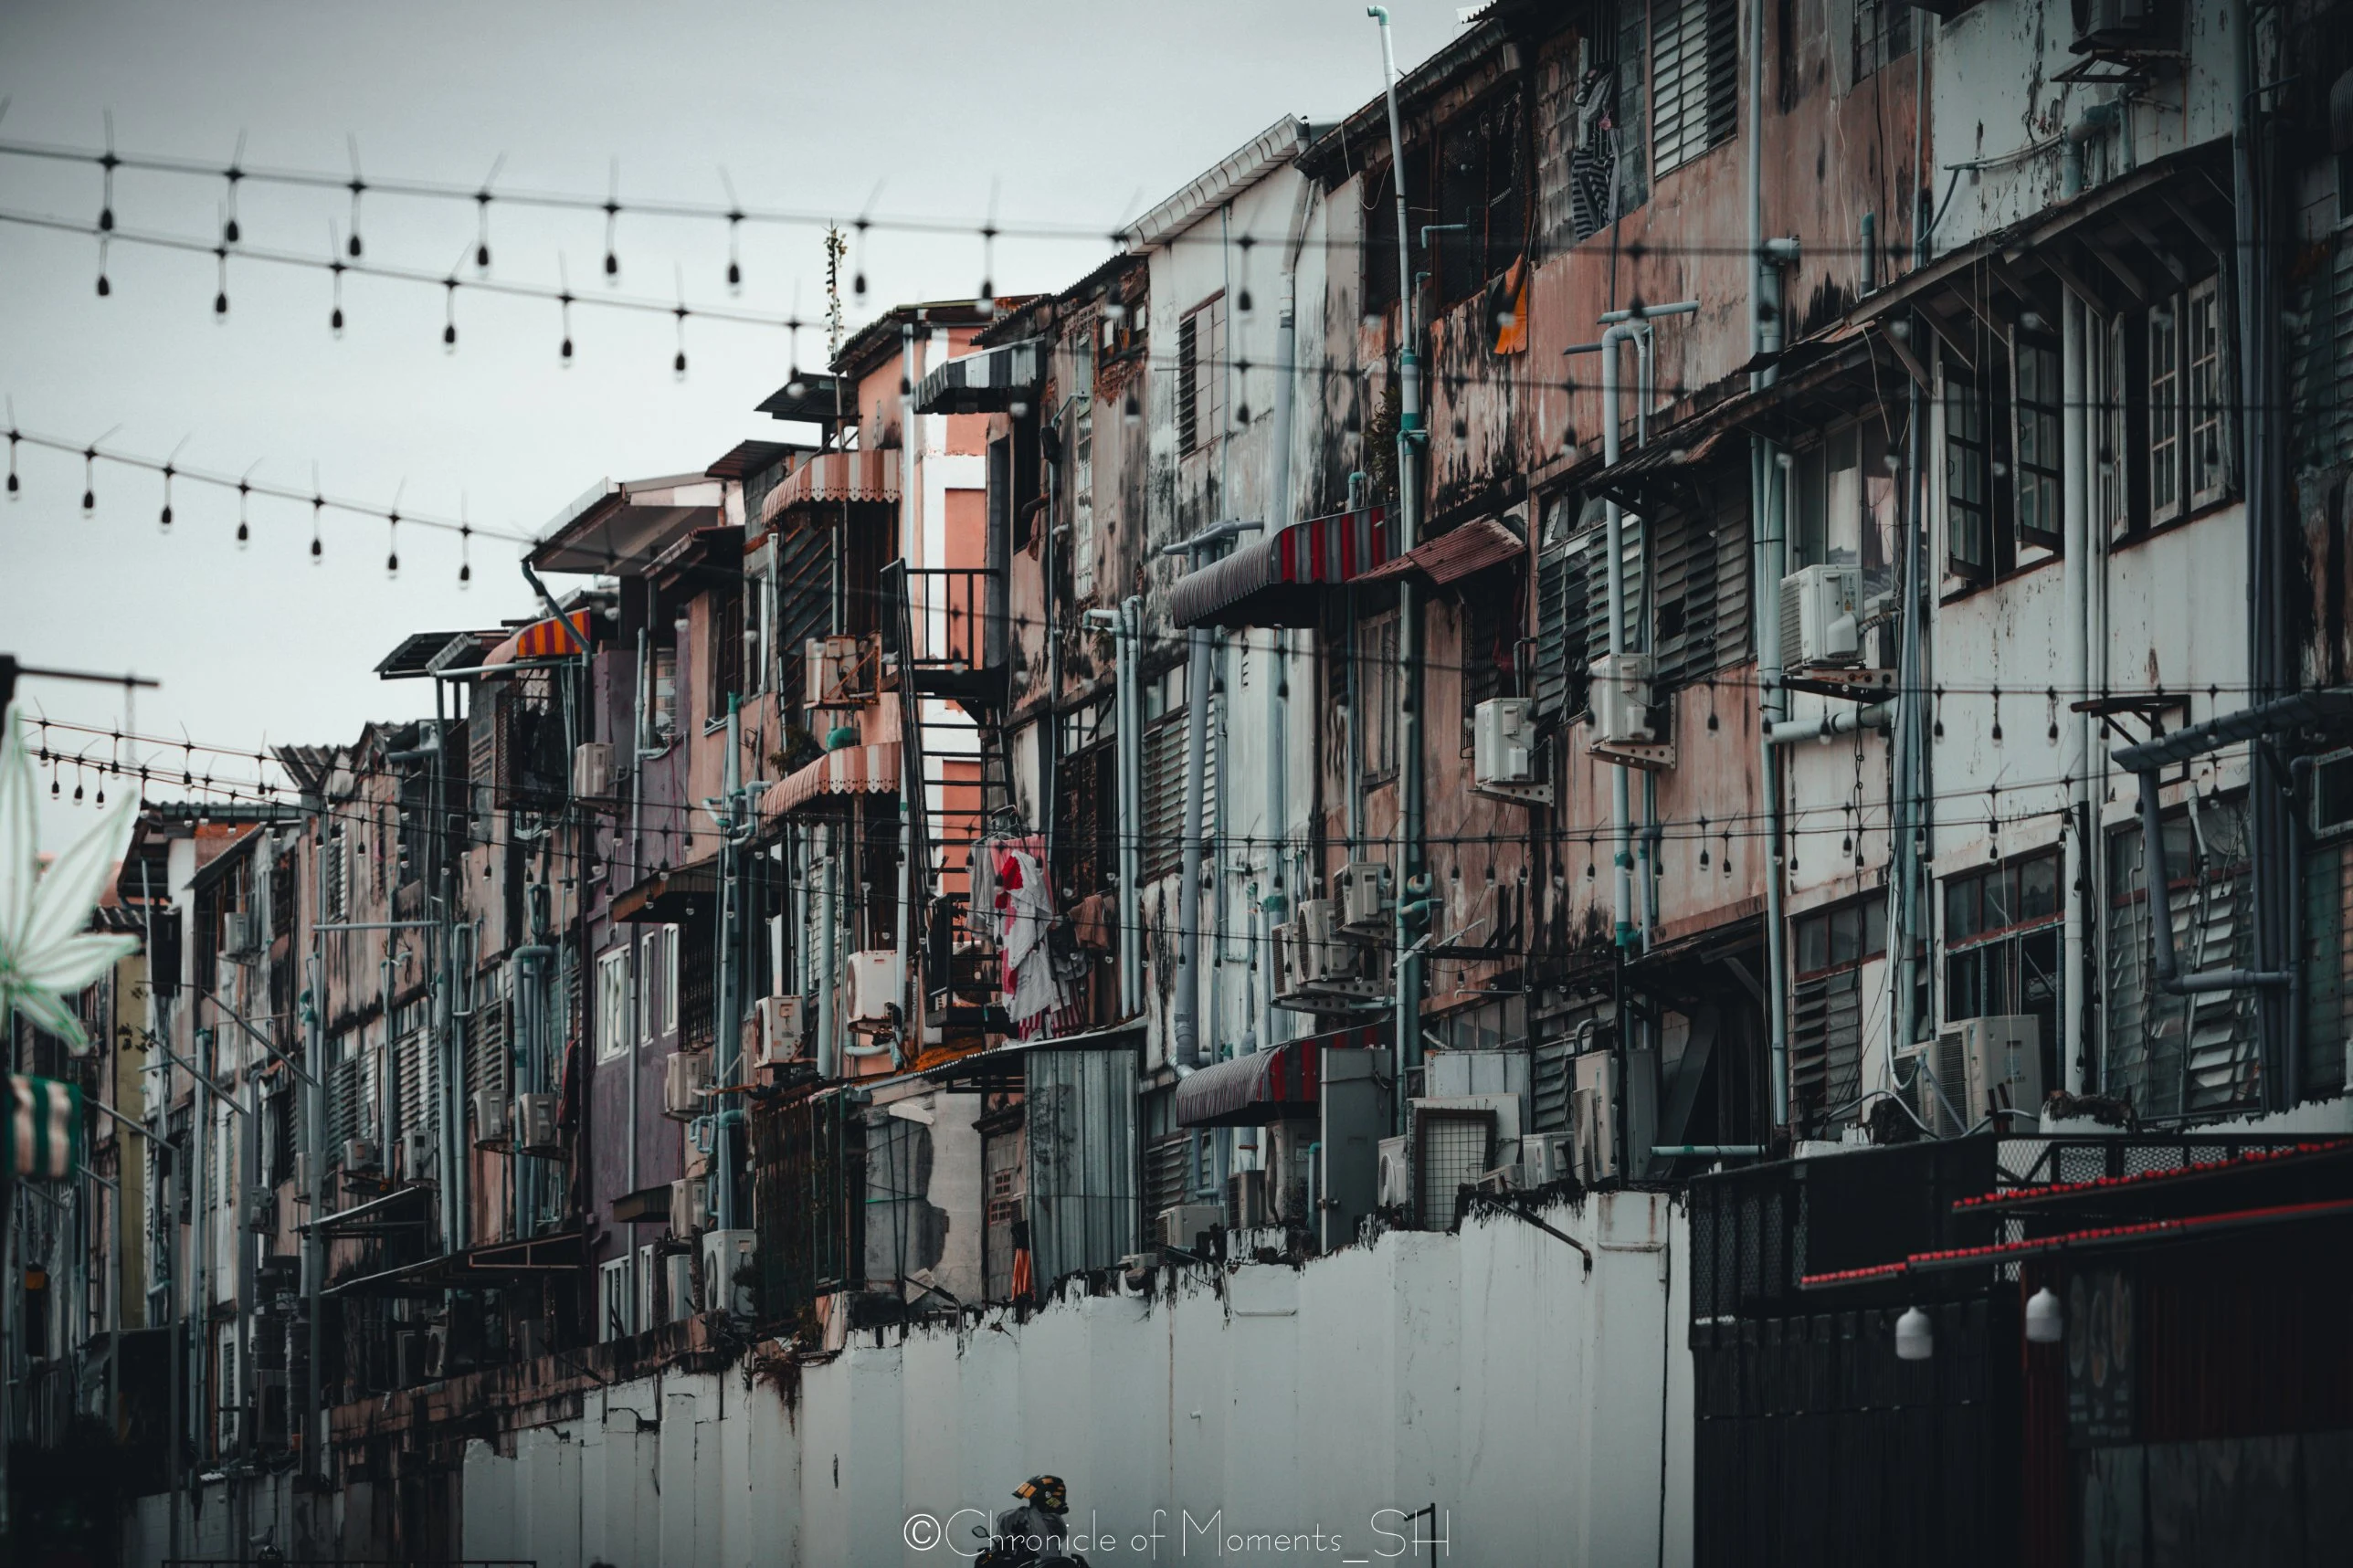
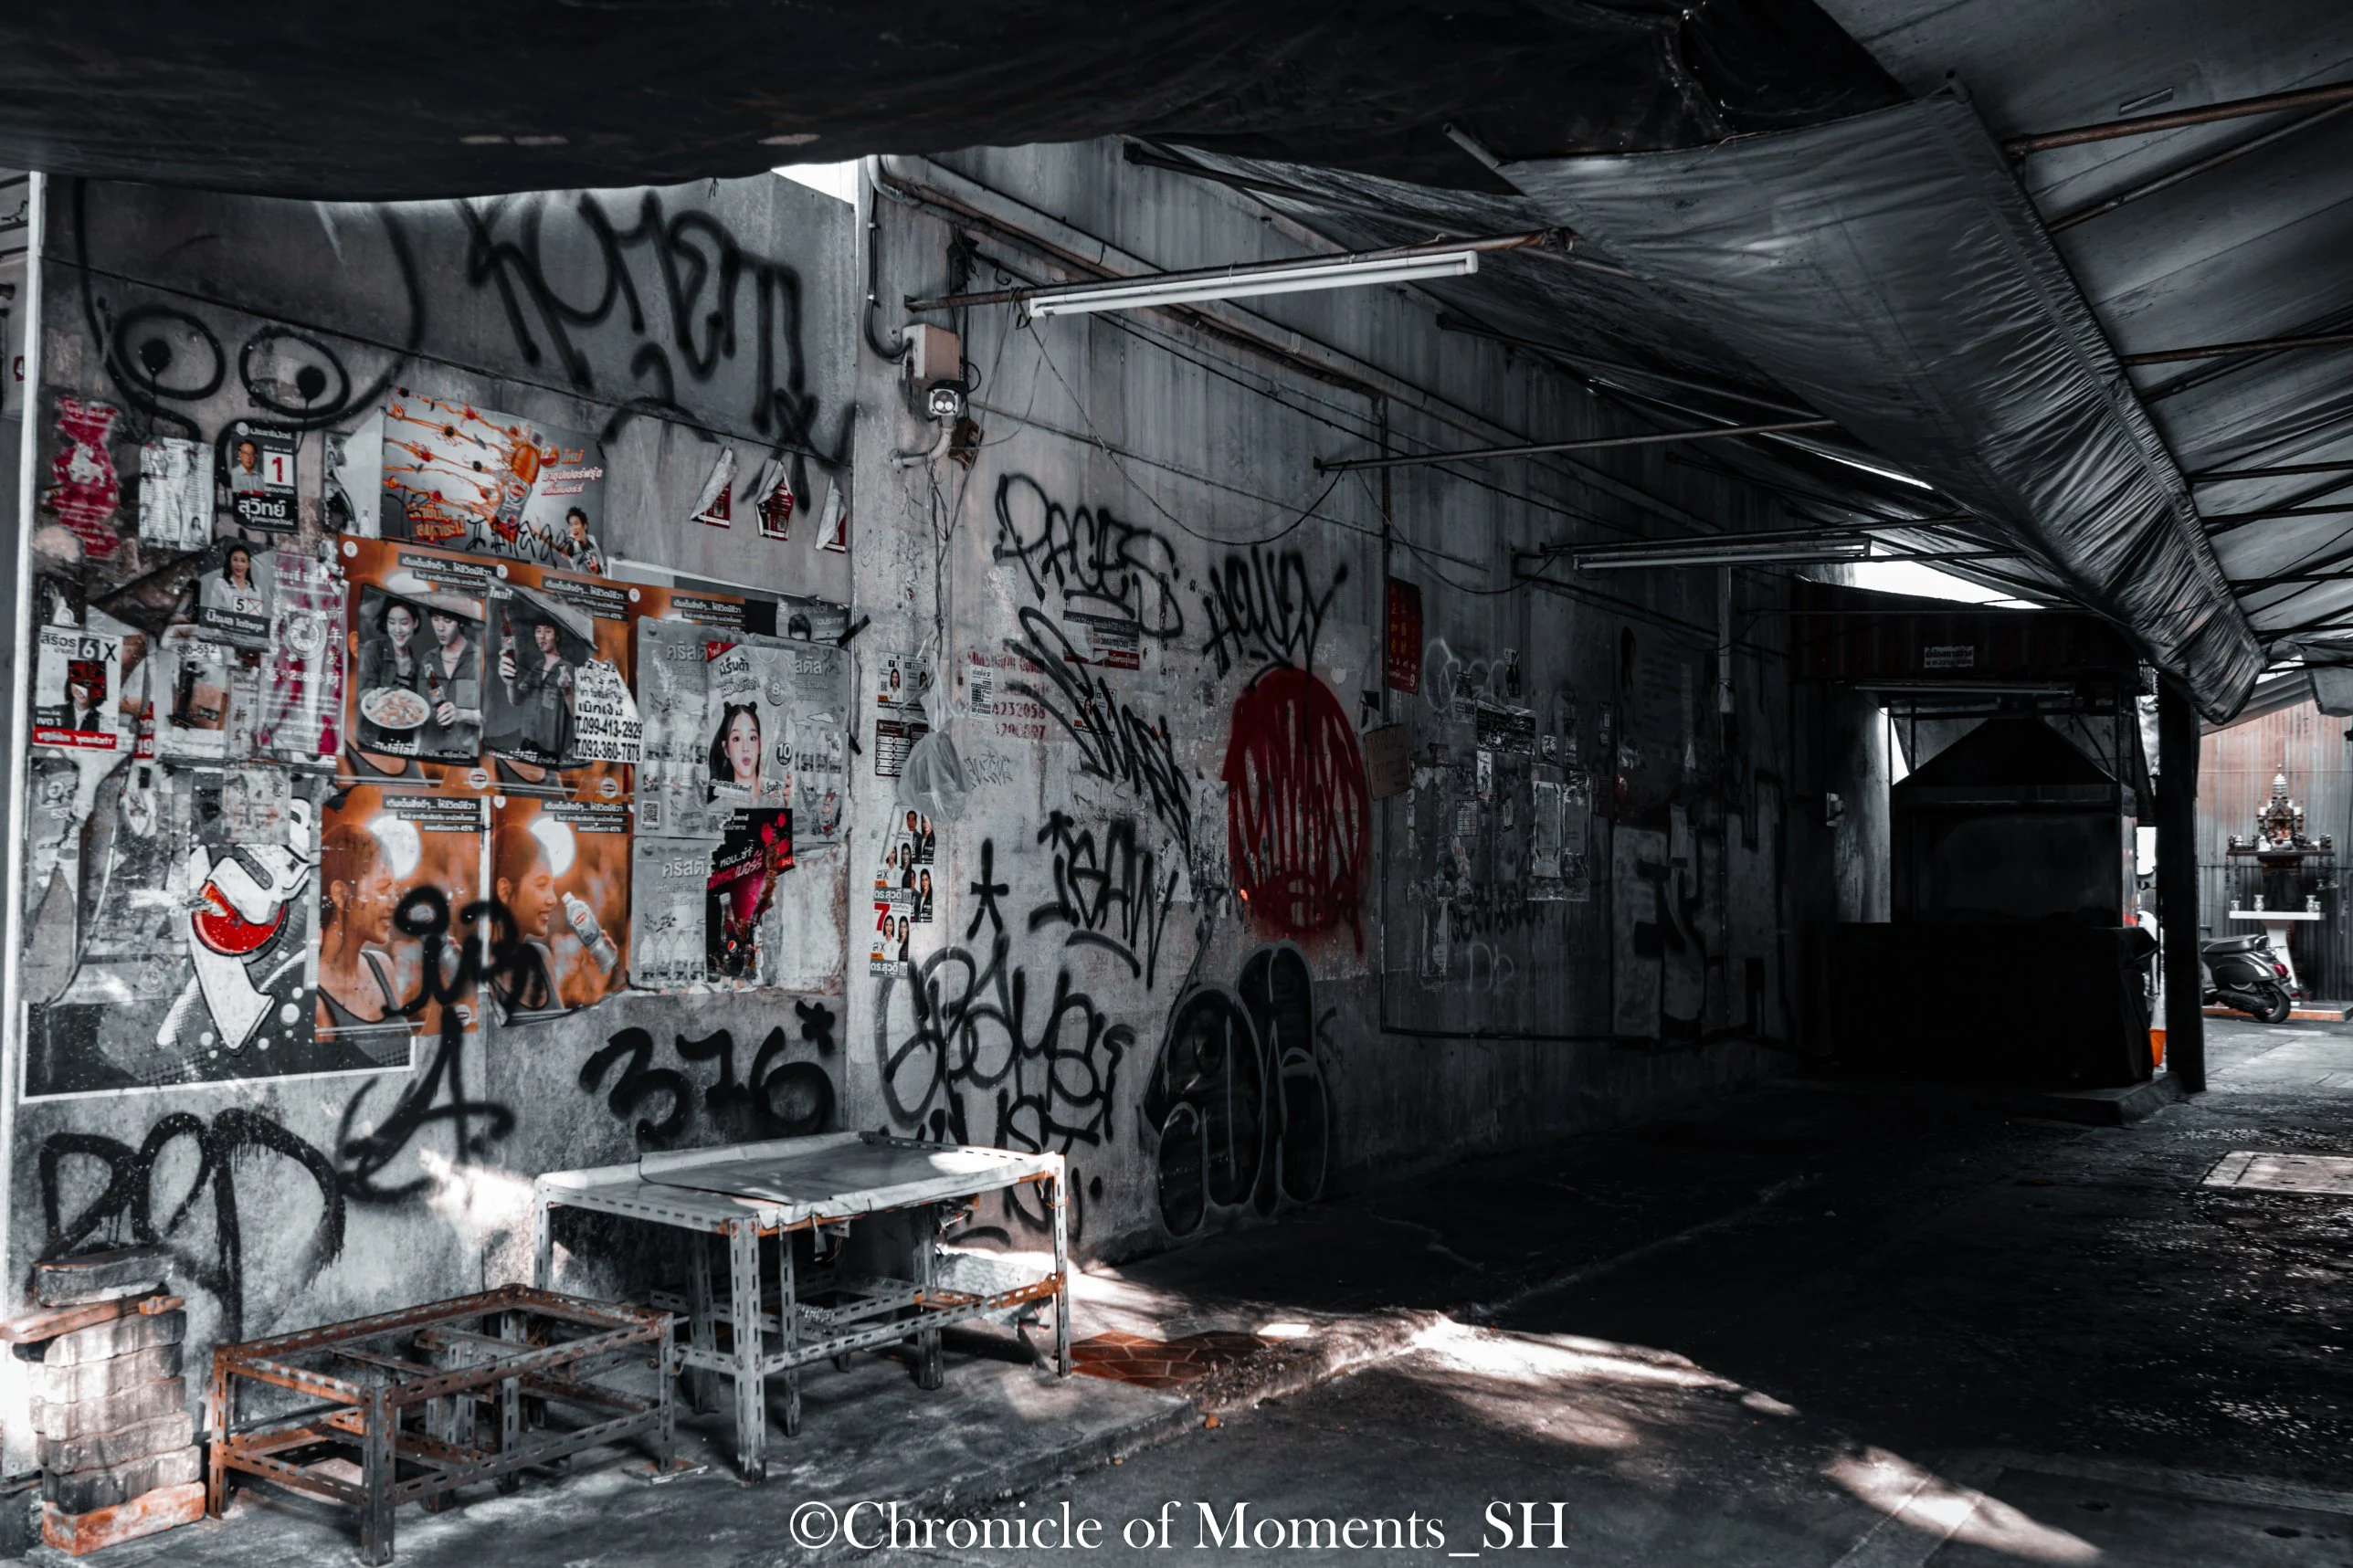
A scene of buildings in a row, or a wall that stretches long, also suits a horizontal frame. The rhythm of windows and roofs repeating left and right reads as a single flow inside the frame. Both photos below are horizontal scenes like this.
(Click a photo to view it at full size)
The photo on the left pulls in distant buildings with a 124mm telephoto. A telephoto compresses front-to-back distance so the buildings look stacked on top of each other, and the horizontal frame carries this flow along without breaking it. In 35mm equivalent it is an angle of view of about 198mm.
The photo on the right uses a 20mm wide angle to capture a wall full of graffiti and the shaded passage leading inward. The painting on the wall spreads wide across the frame, and the dark inner space on the right balances it. Because the shutter is slow at 1/2 s, handheld shooting easily blurs, so it is safer to brace yourself or fix the camera on a tripod or a support. At the border between dark indoors and outdoors there are times when you have no choice but to use a slow shutter, so a habit of fixing the camera is needed rather than trusting stabilization.
When Horizontal Fits ③: When the Subject Itself Is Long Sideways
If the subject itself is long sideways, horizontal is the default. For subjects with a large left-right width, such as vehicles, trains, or long walls, shooting vertically either cuts off part of them or makes the subject small and wastes space above and below.

Canon EOS R7 · RF70-200mm F2.8 L IS USM · 111mm · F8 · ISO 100 · 1/125 s · 2024-11-20
(Click the photo to view it at full size)
I filled the horizontal frame with a classic van seen from the side. As the body stretches long left and right, the vertical flag on the right balances it as a vertical element. Shooting from a distance at 111mm kept the shape of the body from distorting (about 178mm equivalent), and stopping down to F8 keeps the whole body relatively sharp. The relationship between aperture and the range in focus is covered in detail in the guide to understanding depth of field.
When Vertical Fits ①: When Height and Space Above and Below Matter
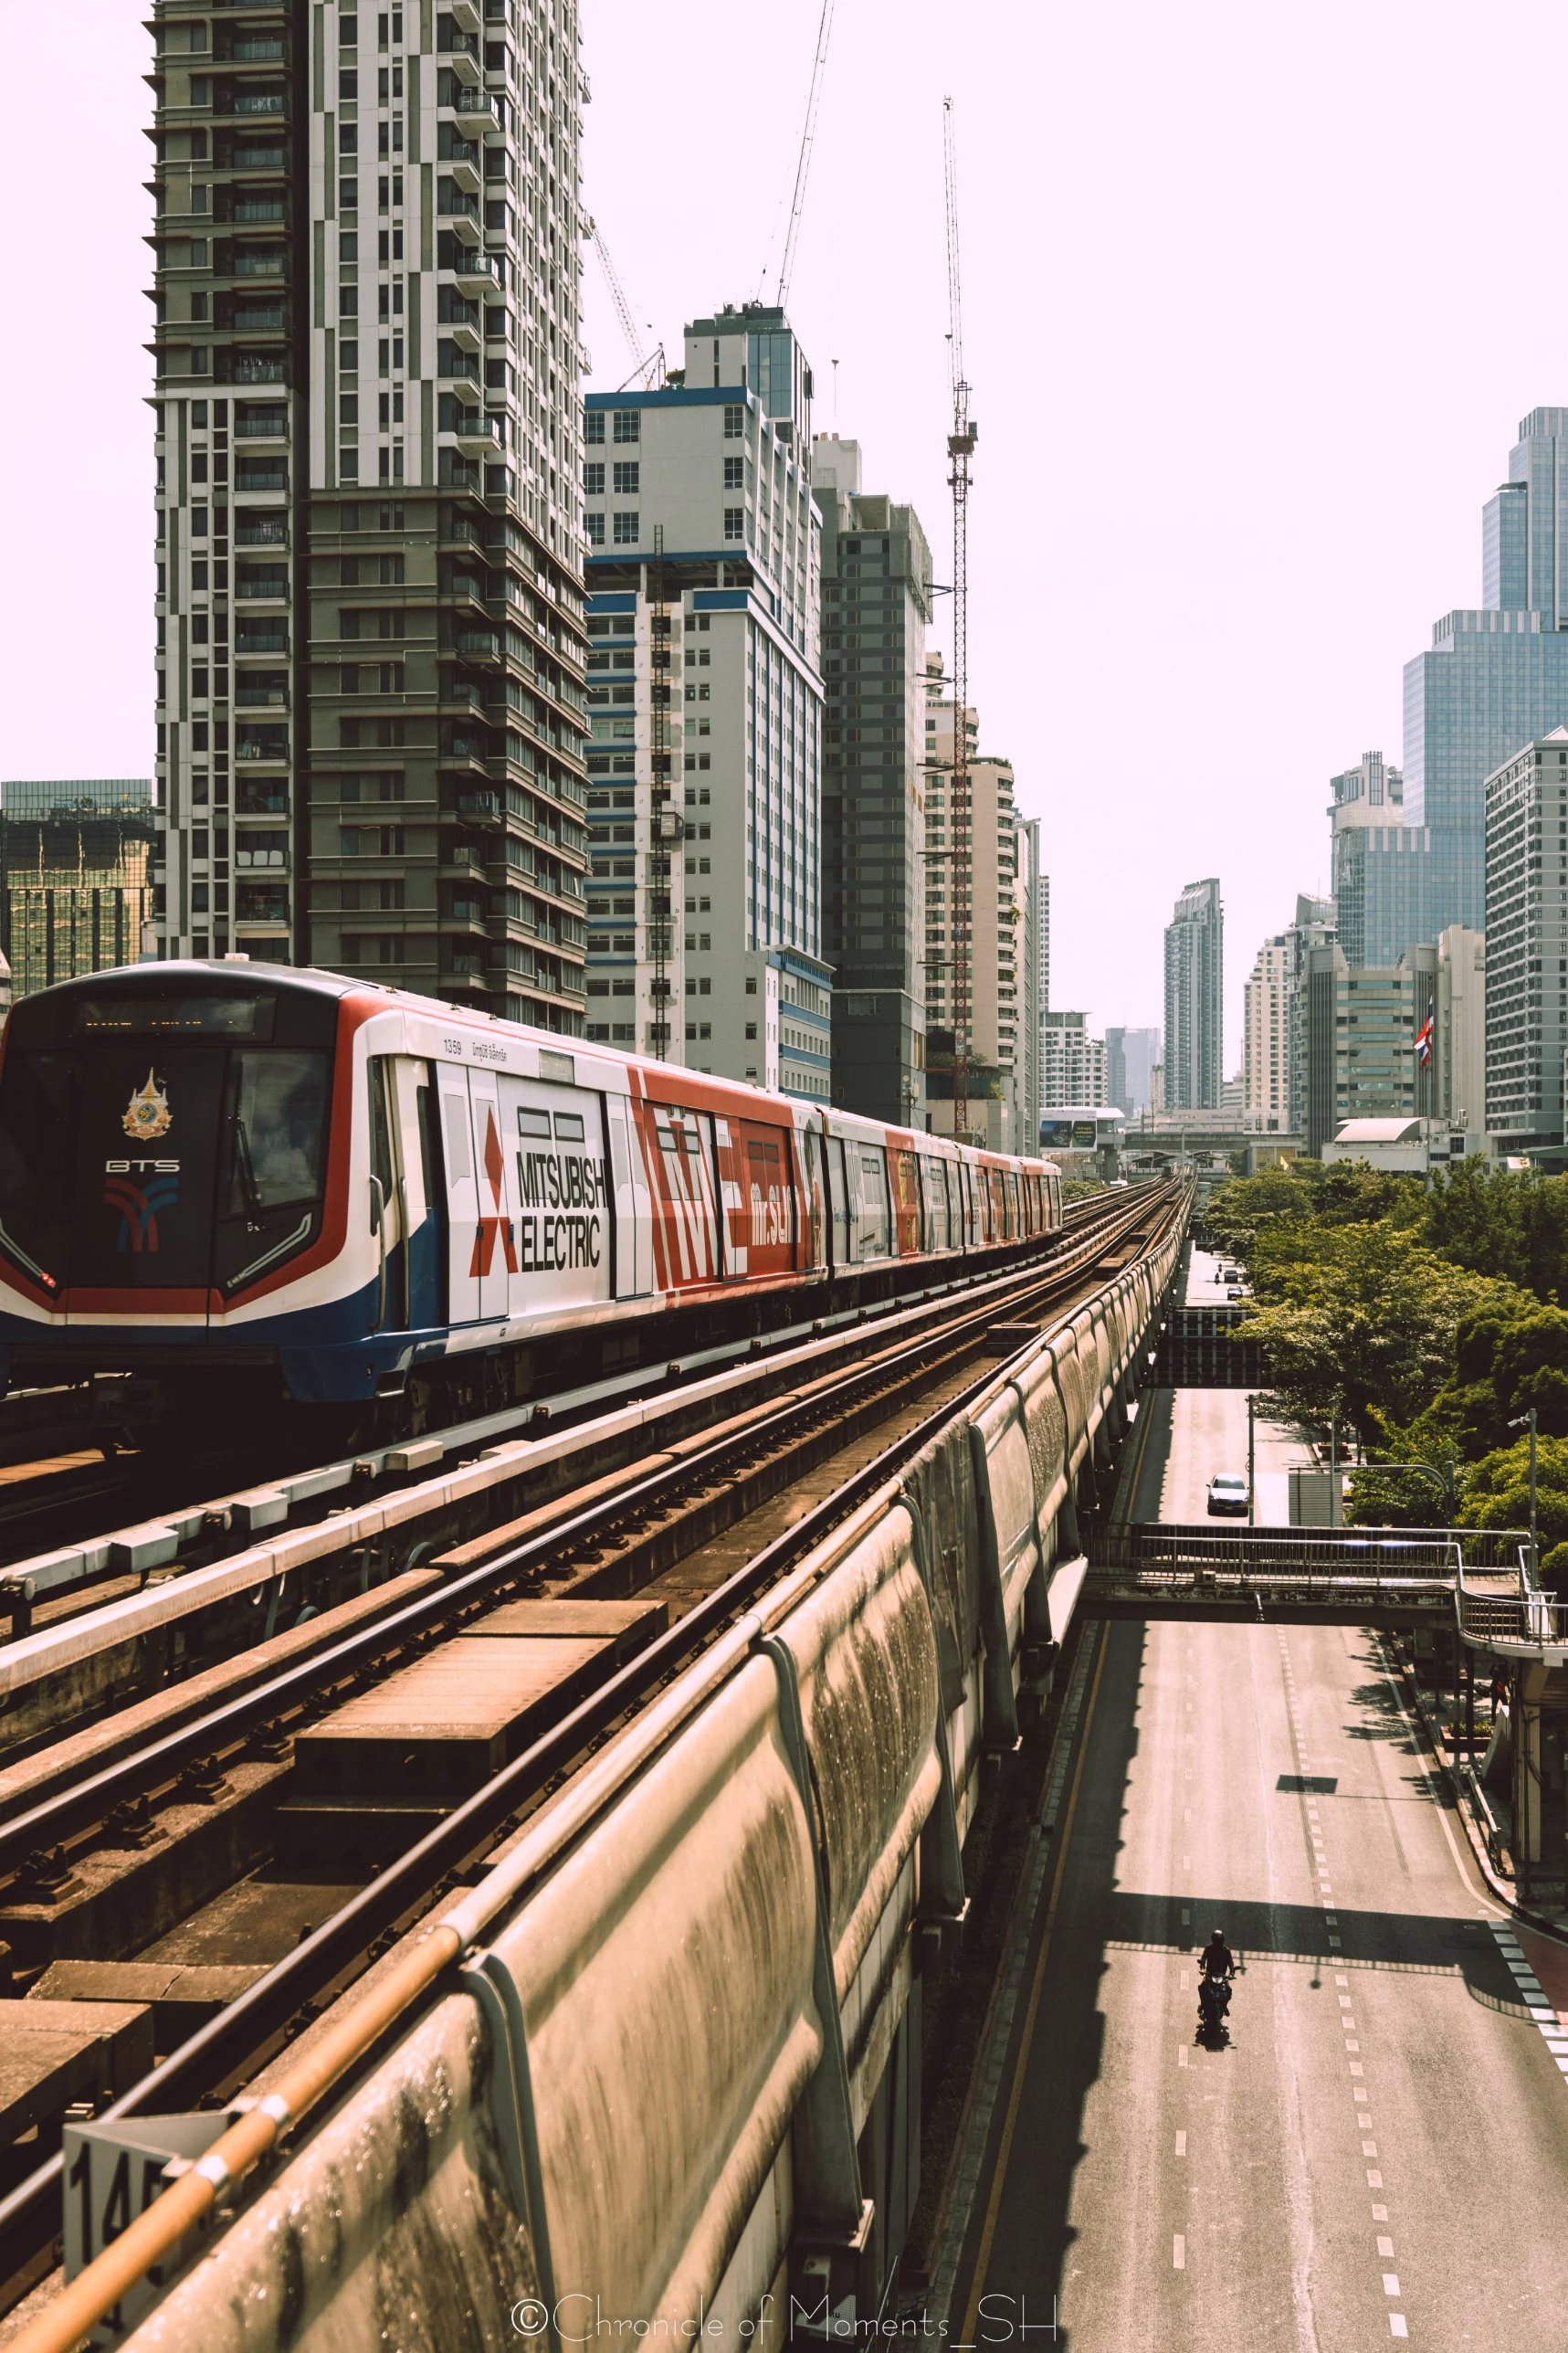
A vertical frame has the power to pull the eye up from below. If there are vertically standing elements such as sky, tall buildings, or streetlights, vertical suits them. Both photos below use a vertical frame to bring out height.
(Click a photo to view it at full size)
The photo on the left shows high-rise buildings soaring upward with the railway receding from bottom to top. The height of the buildings and the sense of depth created by the tracks come alive together inside the vertical frame. The 23mm wide angle strengthens the feeling of the buildings converging upward (about 37mm equivalent), and F2.8 at 1/2500 s freezes the running train sharply.
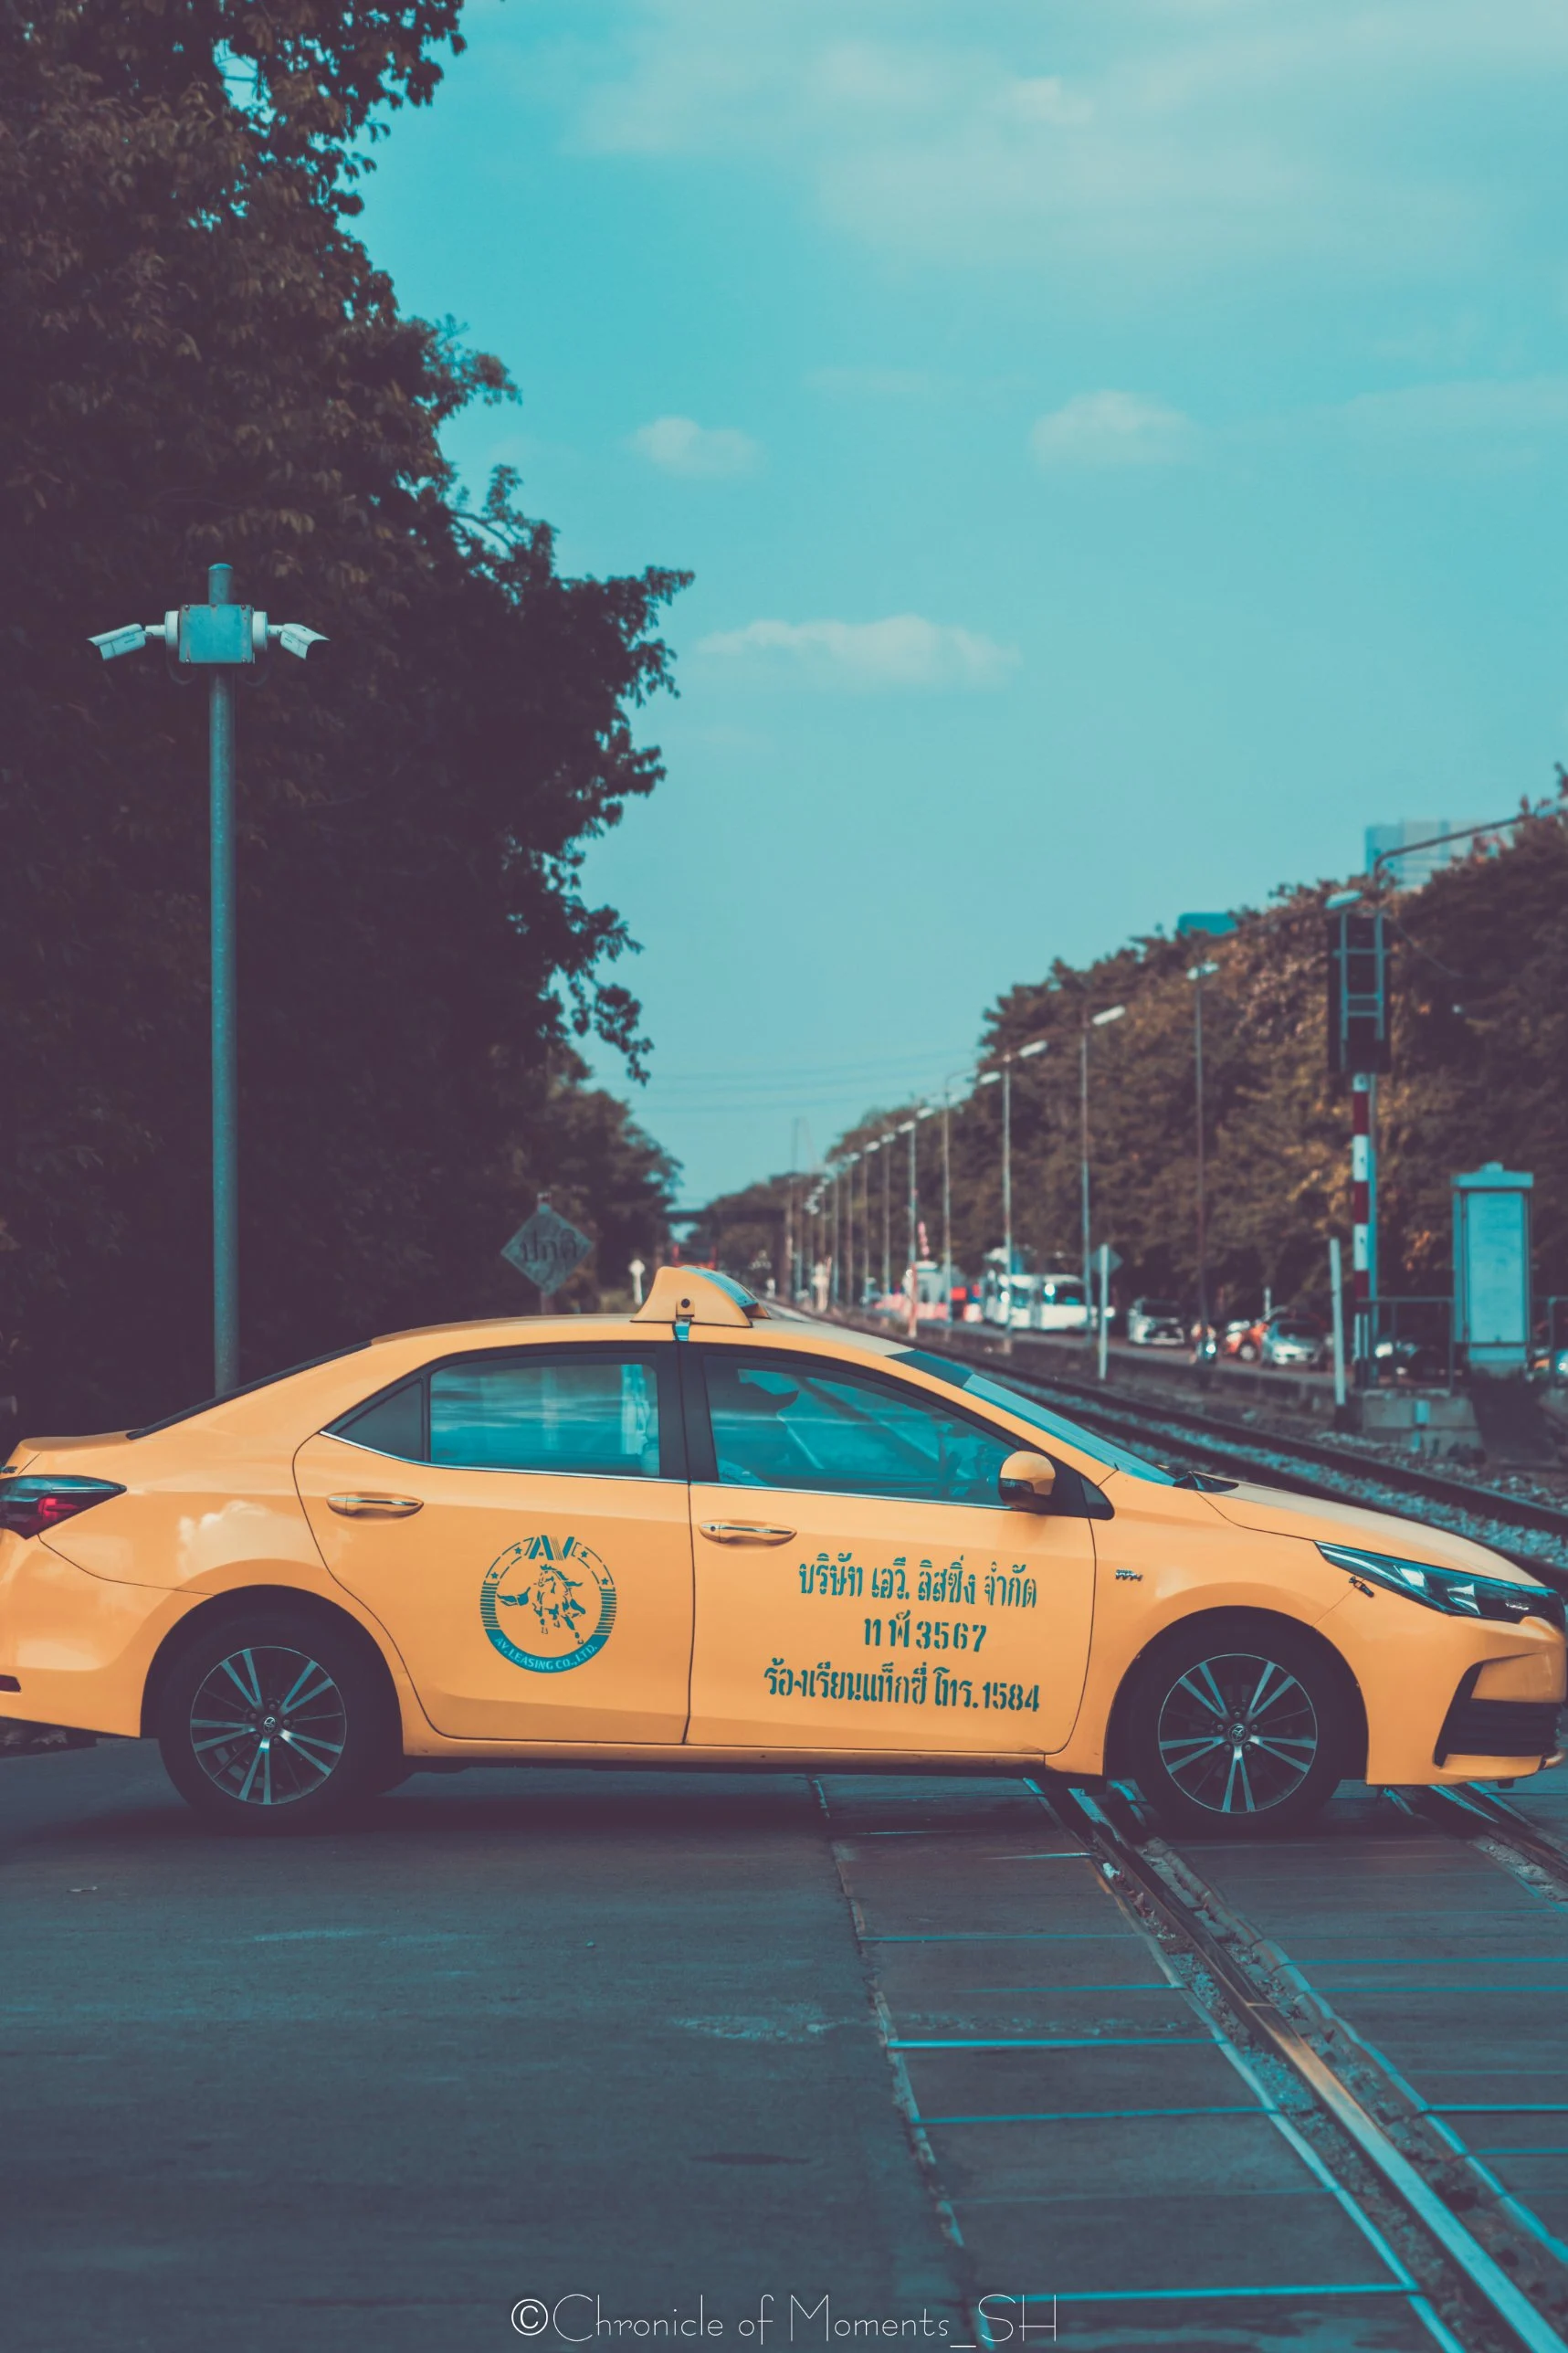
The photo on the right shows a taxi crossing the road. A car is a subject that is long sideways, but I deliberately shot it vertically so that the streetlights and trees above, the blue sky, and the road and ground texture below were all in the frame. It is an example of how, even if the subject is long horizontally, a vertical frame can make a richer photo when the background has many vertical elements. I opened the aperture to F2.8 at 70mm (about 112mm equivalent) to soften the scenery behind.
When Vertical Fits ②: A Narrow Alley With a Sense of Depth
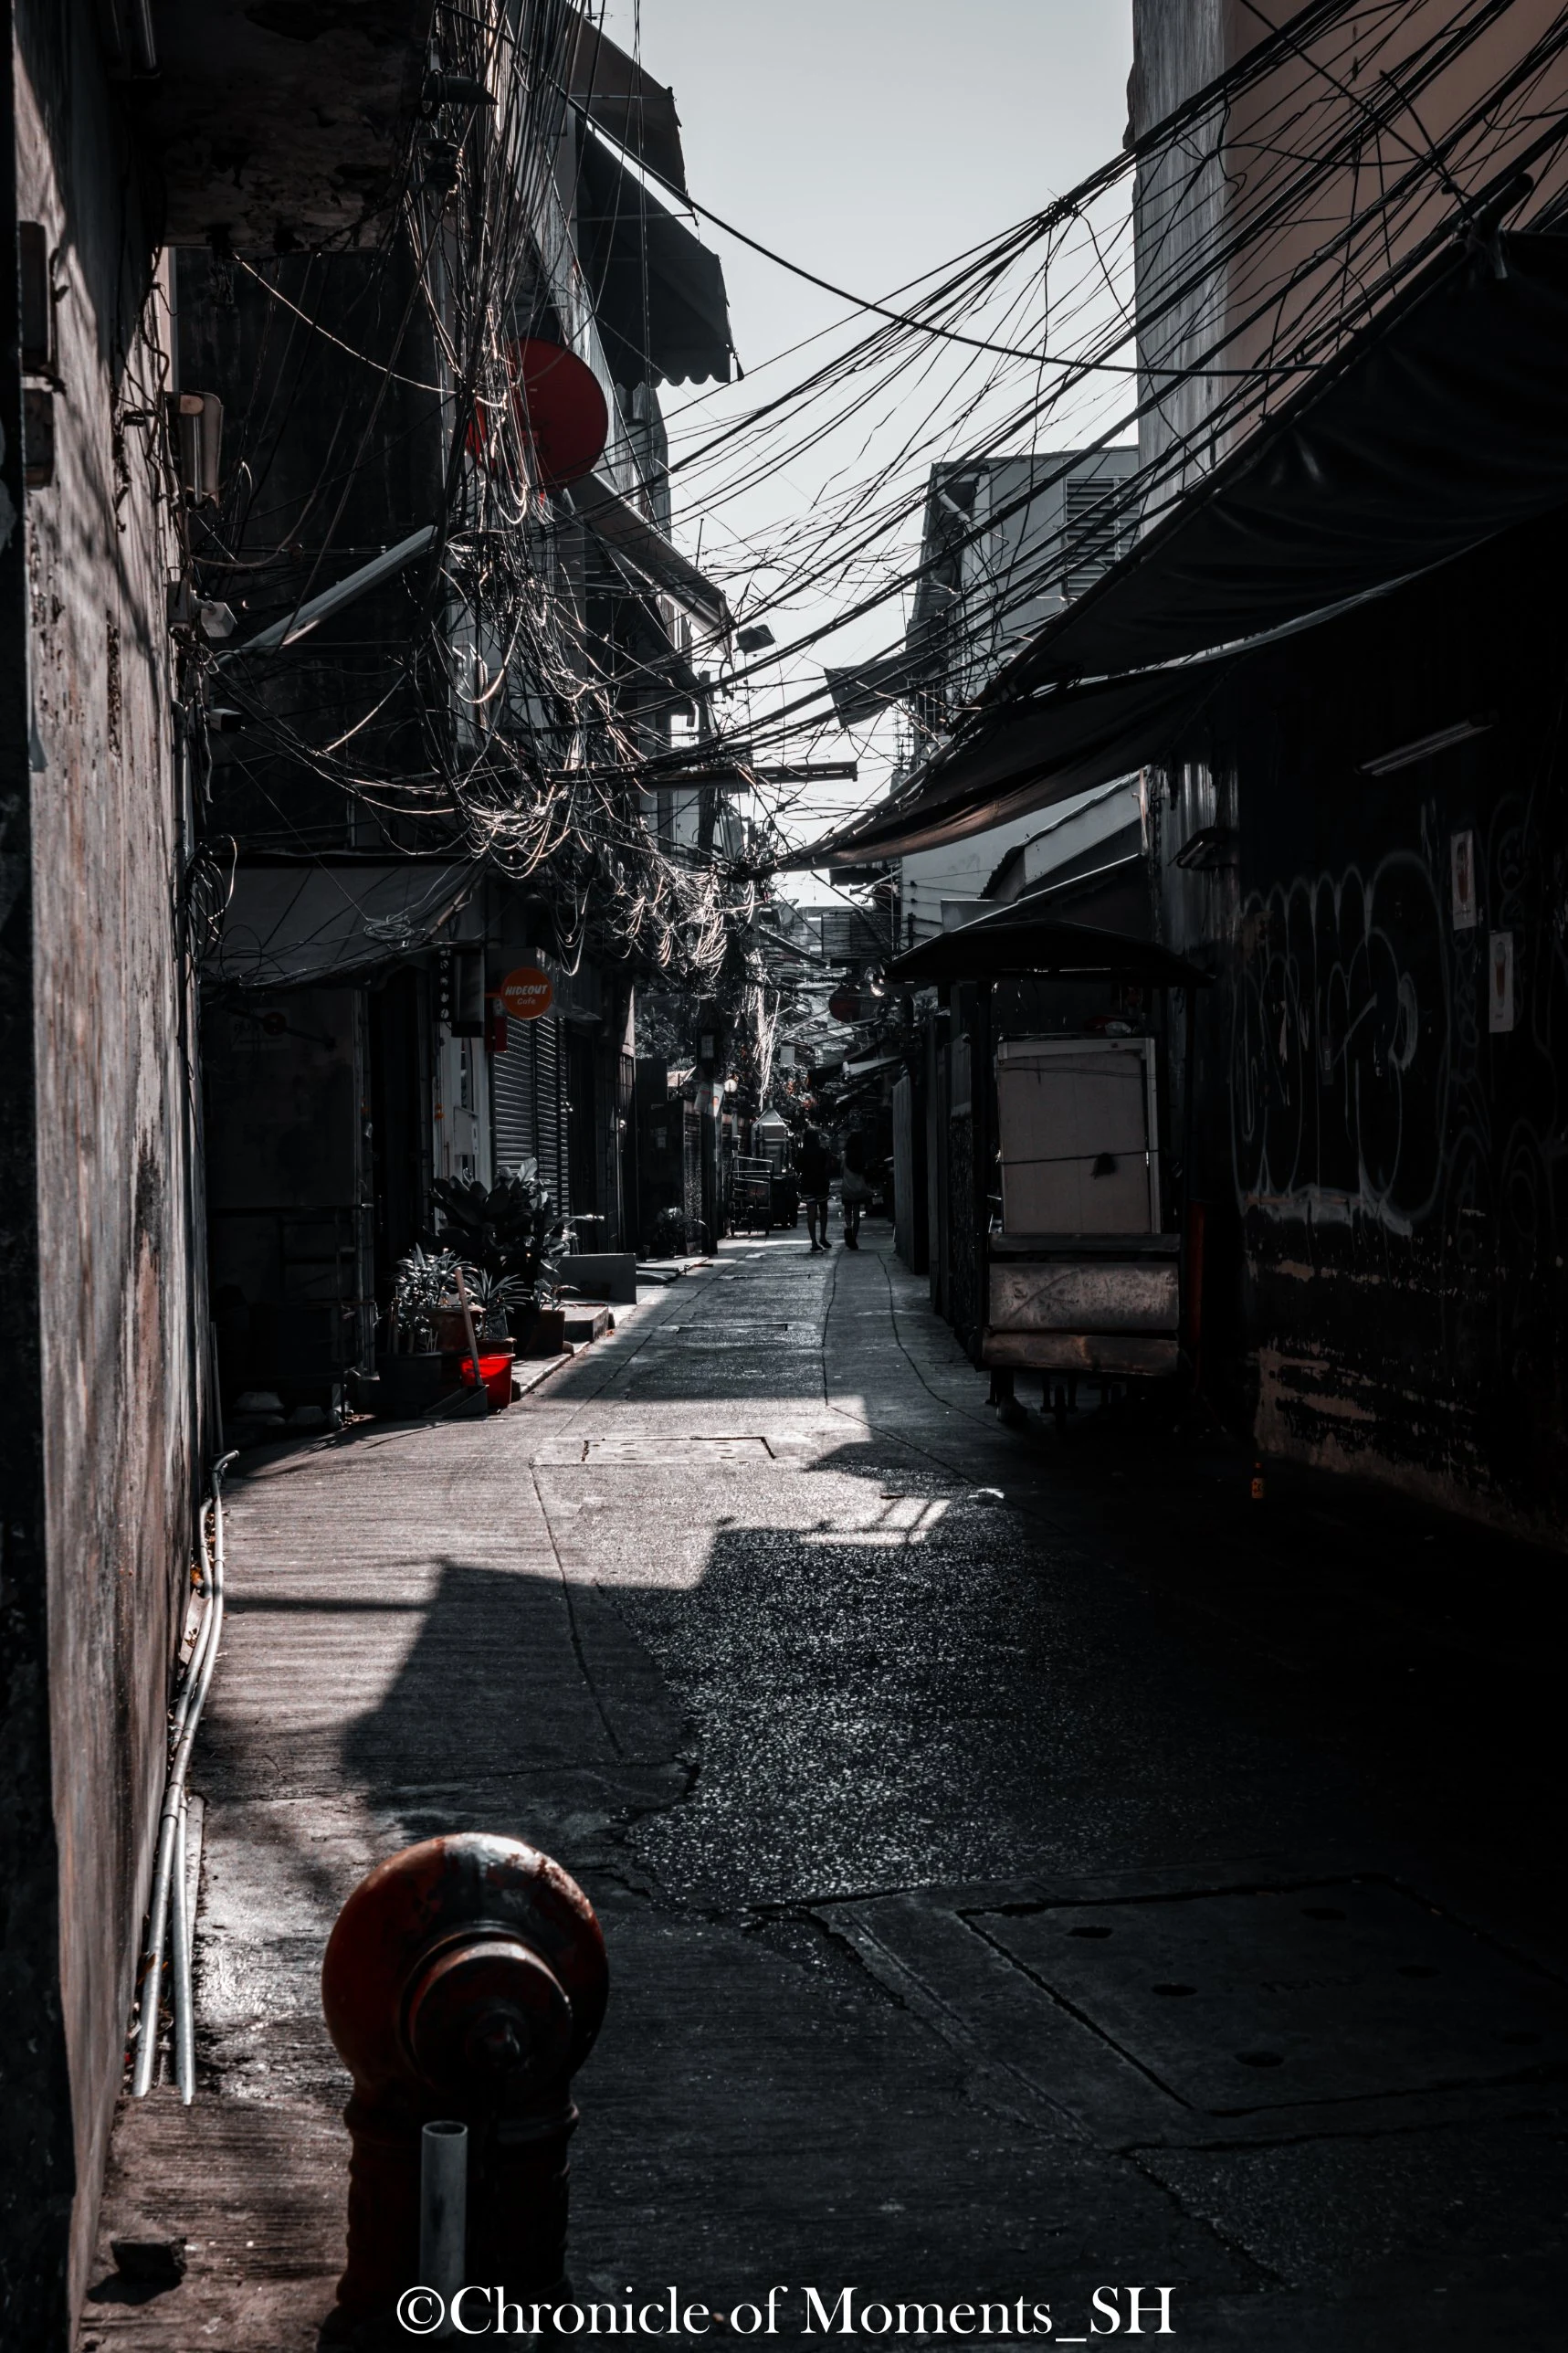
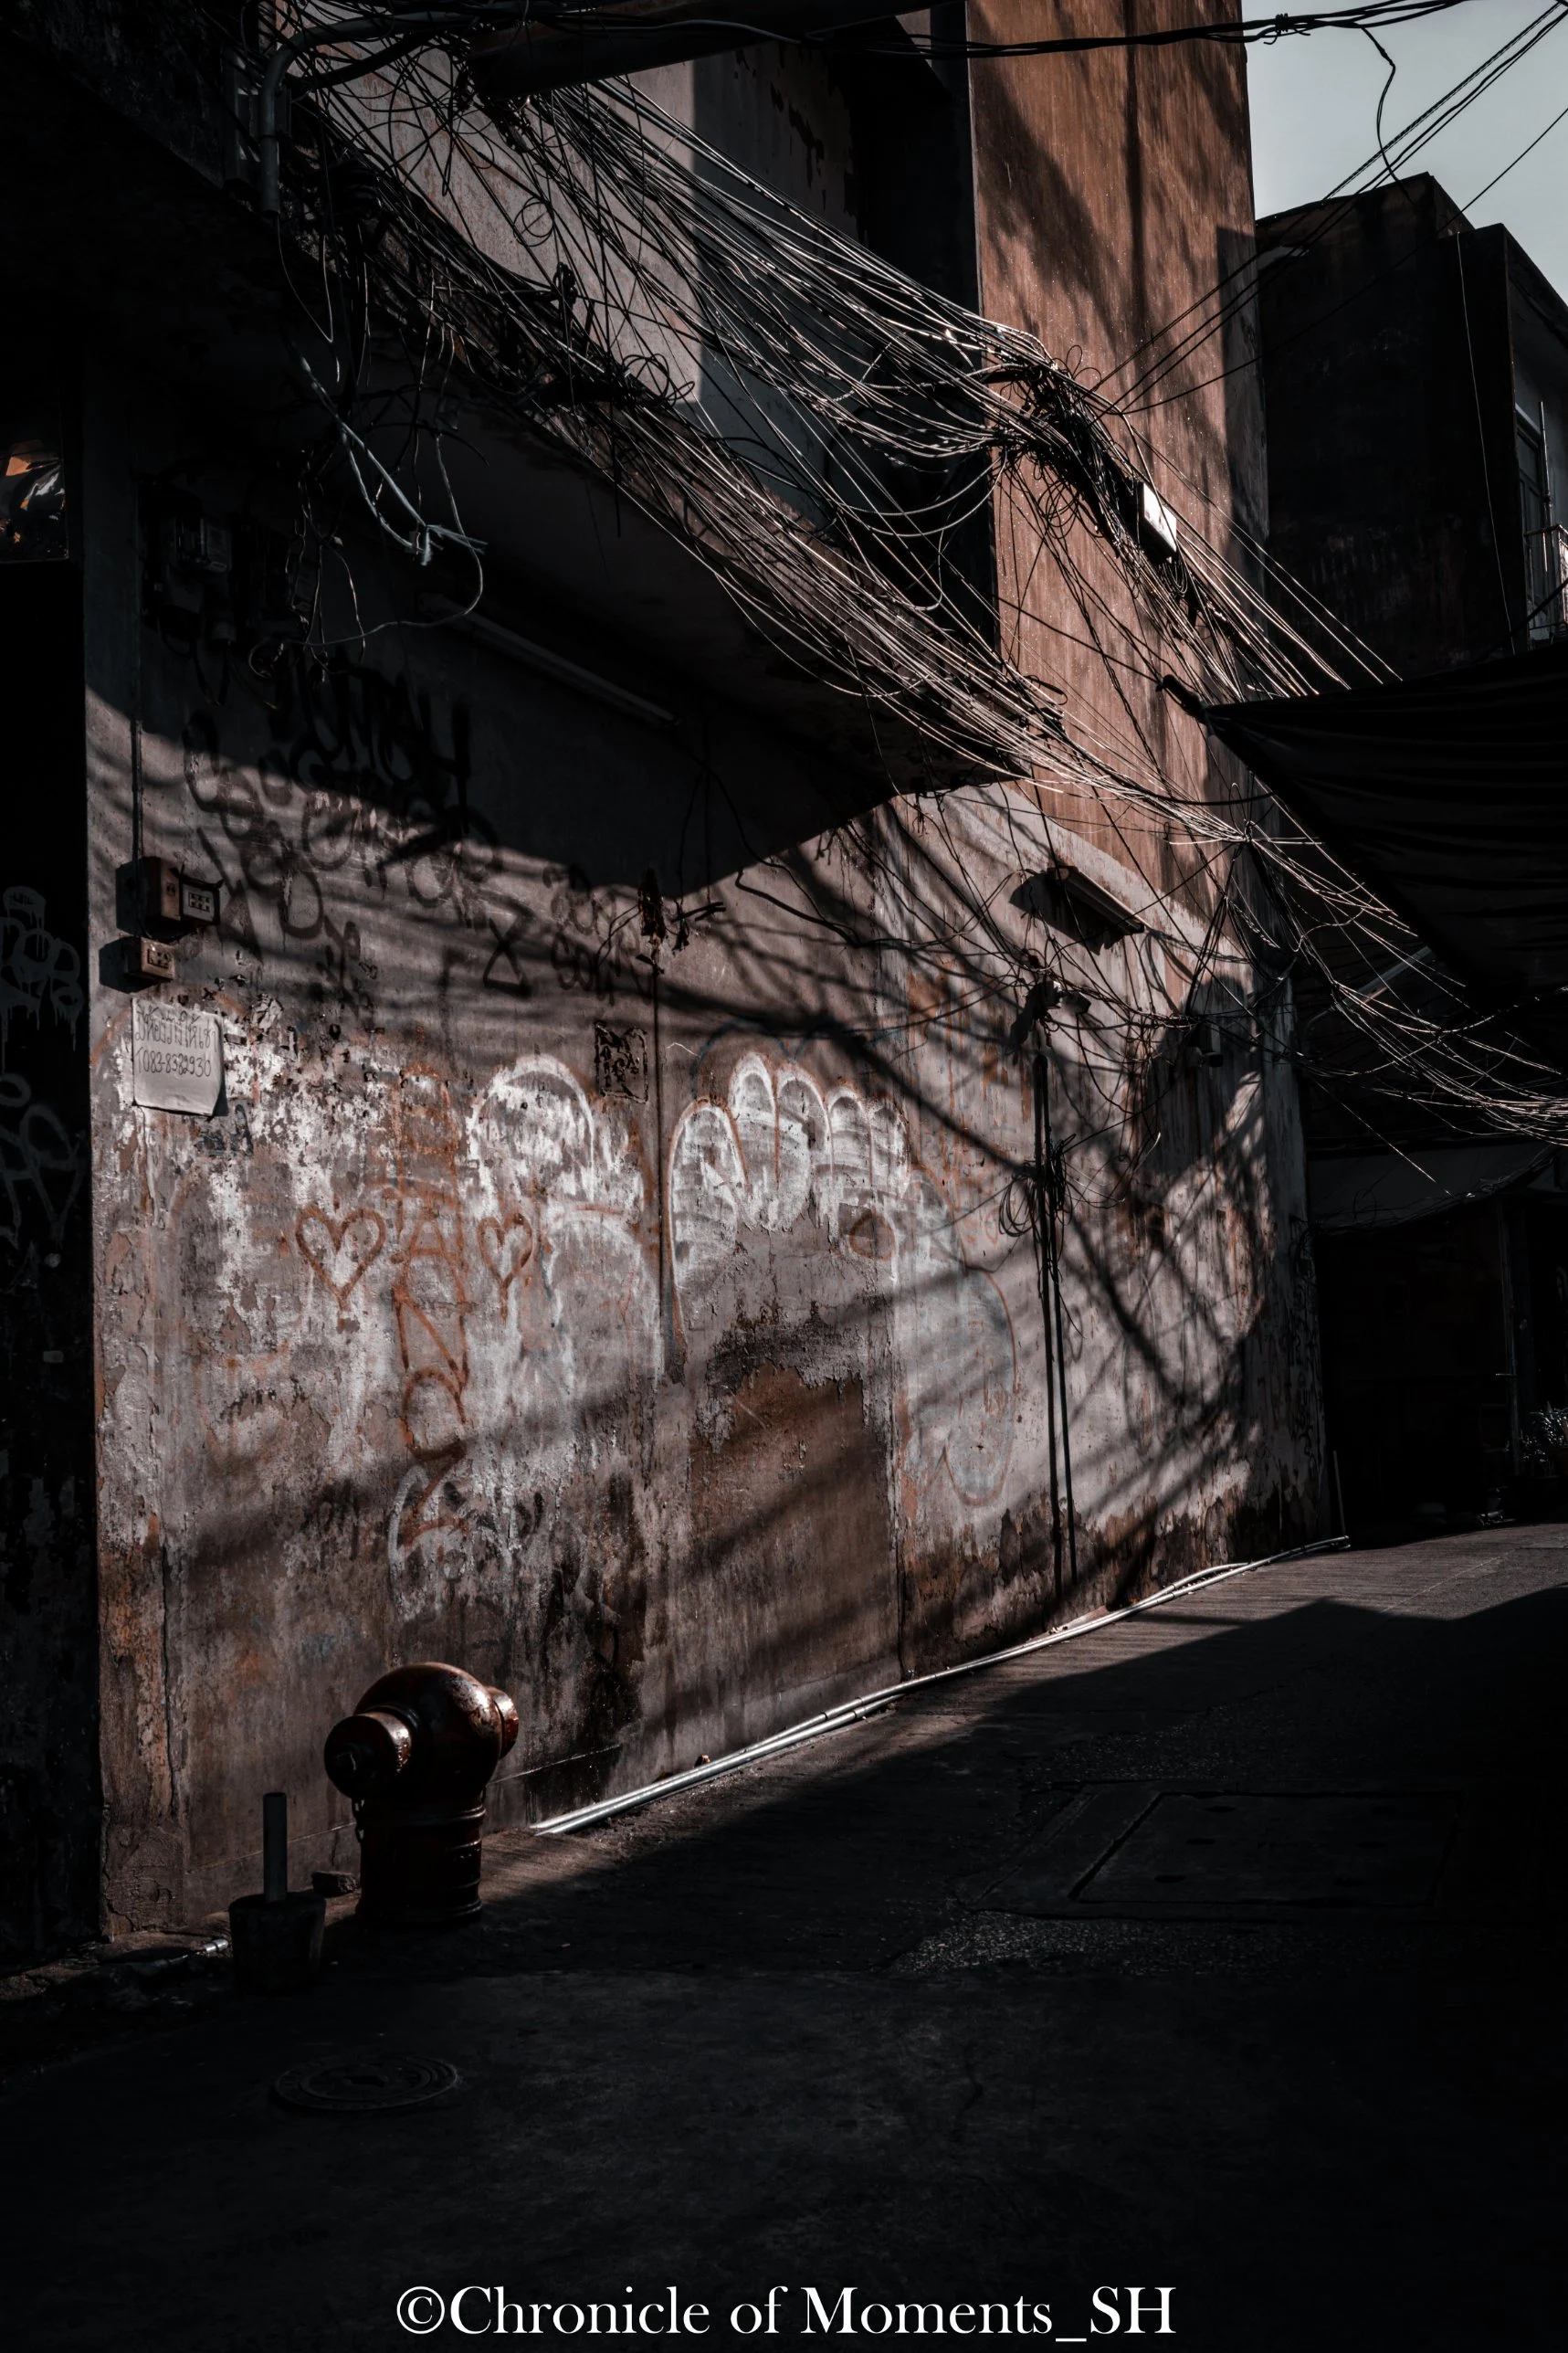
A narrow, long alley or the space between walls fits well in a vertical frame. Keep both sides close and open a path down the middle, and the eye is pulled inward, giving a sense of depth. The two photos below are vertical shots taken in the same alley about 10 seconds apart.
(Click a photo to view it at full size)
The photo on the left draws the eye into the depth of the alley at 35mm (about 56mm equivalent), and the fire hydrant in front holds the gaze. The photo on the right captures the wall, wires, and hydrant in one frame at 23mm (about 37mm equivalent). Both were stopped down to F8 so everything from the hydrant in front to the buildings behind comes out sharp, and because the sun was low, the shutter slowed to 1/30 s and 1/60 s. In such cases, brace your body to avoid shake, and if necessary raise the ISO to secure a faster shutter.
Even the same alley becomes a different photo depending on where you put the focus. One emphasizes the depth of the road, and the other the texture of the wall and wires. By turning the camera on location, you can make two stories out of the same place.
Horizontal or Vertical: A Simple Way to Choose
Summing up the various scenes, the criteria for choosing orientation come down to three. The first is the shape of the subject and the scene. If it is long sideways, horizontal; if it is long vertically, vertical is the default. The second is the elements you want inside the frame. If elements like sky, ground, or vertical structures matter, choose vertical; if a flow that continues left and right matters, choose horizontal. The third is where the photo will be viewed. For blog body text or monitors, horizontal; if you want it to fill a smartphone screen, vertical suits.
It is also good to think about angle of view and aperture together with the orientation. Shooting vertically narrows the side space, so you may need a wider angle of view from the same distance, and when shooting horizontally, opening the aperture or changing position helps tidy up a background that comes in wide on both sides. To estimate the angle of view in advance you can use the field of view calculator, and conversion by sensor size is summarized in the sensor size and crop factor guide.
Settings for All 8 Photos at a Glance
| Photo | Orientation | Lens | Focal length (equiv.) | Aperture | Shutter | ISO |
|---|---|---|---|---|---|---|
| 1. Beach and sky | Horizontal | RF15-35mm | 15mm (about 24mm) | F2.8 | 1/2500 s | 100 |
| 2. Row of buildings | Horizontal | RF70-200mm | 124mm (about 198mm) | F2.8 | 1/1250 s | 250 |
| 3. Graffiti wall | Horizontal | RF15-35mm | 20mm (about 32mm) | F2.8 | 1/2 s | 100 |
| 4. Classic van | Horizontal | RF70-200mm | 111mm (about 178mm) | F8 | 1/125 s | 100 |
| 5. Taxi on the road | Vertical | RF24-70mm | 70mm (about 112mm) | F2.8 | 1/1600 s | 100 |
| 6. High-rises and train | Vertical | RF15-35mm | 23mm (about 37mm) | F2.8 | 1/2500 s | 100 |
| 7. Narrow alley | Vertical | RF15-35mm | 35mm (about 56mm) | F8 | 1/30 s | 100 |
| 8. Wall and wires | Vertical | RF15-35mm | 23mm (about 37mm) | F8 | 1/60 s | 100 |
Checklist
- Is the subject or scene long sideways, or long vertically?
- Which orientation brings in the elements you really want in the frame (sky, ground, vertical structures) better?
- Will this photo mostly be viewed on a monitor or a smartphone?
- Did you rotate the camera and take one more shot of the same place?
- When you change orientation, does anything unnecessary get caught at the edges?
Common Mistakes: Deciding Orientation by Habit Alone
The most common mistake is always shooting in the same orientation without looking at the scene. People with a horizontal habit shoot tall buildings and narrow alleys horizontally and the top and bottom get cut off, while people with a vertical habit shoot wide landscapes vertically and lose the breadth of the scene. Just turning the camera once on location often reveals a much better orientation.
Another is shooting vertically without thinking about the space on the left and right. A vertical frame is narrow sideways, so surrounding elements are easily cut off awkwardly. Finally, thinking you can just crop to change the orientation later is also risky. Cropping a horizontal photo into a vertical one greatly reduces pixels and angle of view. It is best to shoot in the intended orientation from the start, and if you are not sure, shoot both horizontal and vertical.
FAQ
Which is the better photo, horizontal or vertical?
Neither is better by default. It depends on the shape of the scene and what you want to emphasize. Horizontal suits scenes that are wide sideways, and vertical suits scenes where height and depth matter.
Is it okay to shoot both orientations of one scene?
Yes. On location it is often hard to tell which orientation is better, so I recommend shooting both horizontal and vertical and choosing later. If storage is a concern, it is enough to do it only for important scenes.
How should I choose a lens for vertical shooting?
A vertical frame is narrow from side to side, so it is easier to use a wider angle of view from the same distance. For tall buildings or narrow alleys a wide-angle lens suits, and when capturing a person or object large, a standard to medium telephoto lens suits.
Is vertical better for photos meant to be viewed on a smartphone?
Many people hold their smartphone vertically, so vertical photos easily fill the screen. However, if the content of the photo is a horizontal scene, shooting in the orientation that suits the scene gives a better finished photo than forcing it to vertical.
Putting It Together
Horizontal photos suit wide, sweeping landscapes and subjects that are long sideways, and vertical photos suit scenes where height and depth matter. The 8 photos here show the difference the two orientations make, with the beach, buildings, and classic van shot horizontally, and the train, taxi, and narrow alley shot vertically. When deciding orientation, think in order of the shape of the scene, the elements you want to include, and the screen the photo will be viewed on. You can continue with a more detailed explanation of composition in the light, timing, and composition guide.
Copyright Notice
All photos used in this post are works taken directly by the site operator (Chronicle of Moments_SH). Photographs are protected as photographic works under Article 4(1)(ix) of the Korean Copyright Act, and copyright arises from the moment of shooting without any registration or other procedure (Article 10(2)).
Without the copyright holder's prior permission, it is prohibited to reproduce the photos in this post (Article 16), to post or transmit them on blogs, forums, social media, or communities (public transmission, Article 18), or to modify or edit them into derivative works (Article 22). Removing or altering the copyright notice and frame in a photo can also infringe the right of attribution (Article 12) and the right to integrity (Article 13). Uses the law permits, such as fair quotation of a published work (Article 28) or use within a private or domestic scope (Article 30), are exceptions.
Unauthorized use can lead to injunction claims (Article 123) and damages claims (Article 125), and can be punished by imprisonment of up to 5 years or a fine of up to 50 million won (Article 136(1)). For-profit or habitual infringement can be punished even without a complaint (Article 140).
Photo-use inquiries: skysmoga@gmail.com
© Chronicle of Moments_SH. All rights reserved.